
Welcome to TronGrid !
This tutorial will help you get started with TronGrid so you can build great DApps on the TRON blockchain.
This tutorial will cover :
- Create an account
- Build a new project
- Security features including AllowLists and ways to protect your project
- Send requests
1. Create an Account
First , you need to create an account. To do this , you simply need to provide your email address. We strongly recommend that you join our Discord community to get the latest news , tips and tutorials about TronGrid.

Before using your account , you need to first activate it by clicking the link sent to your mailbox.
2. Create API Key
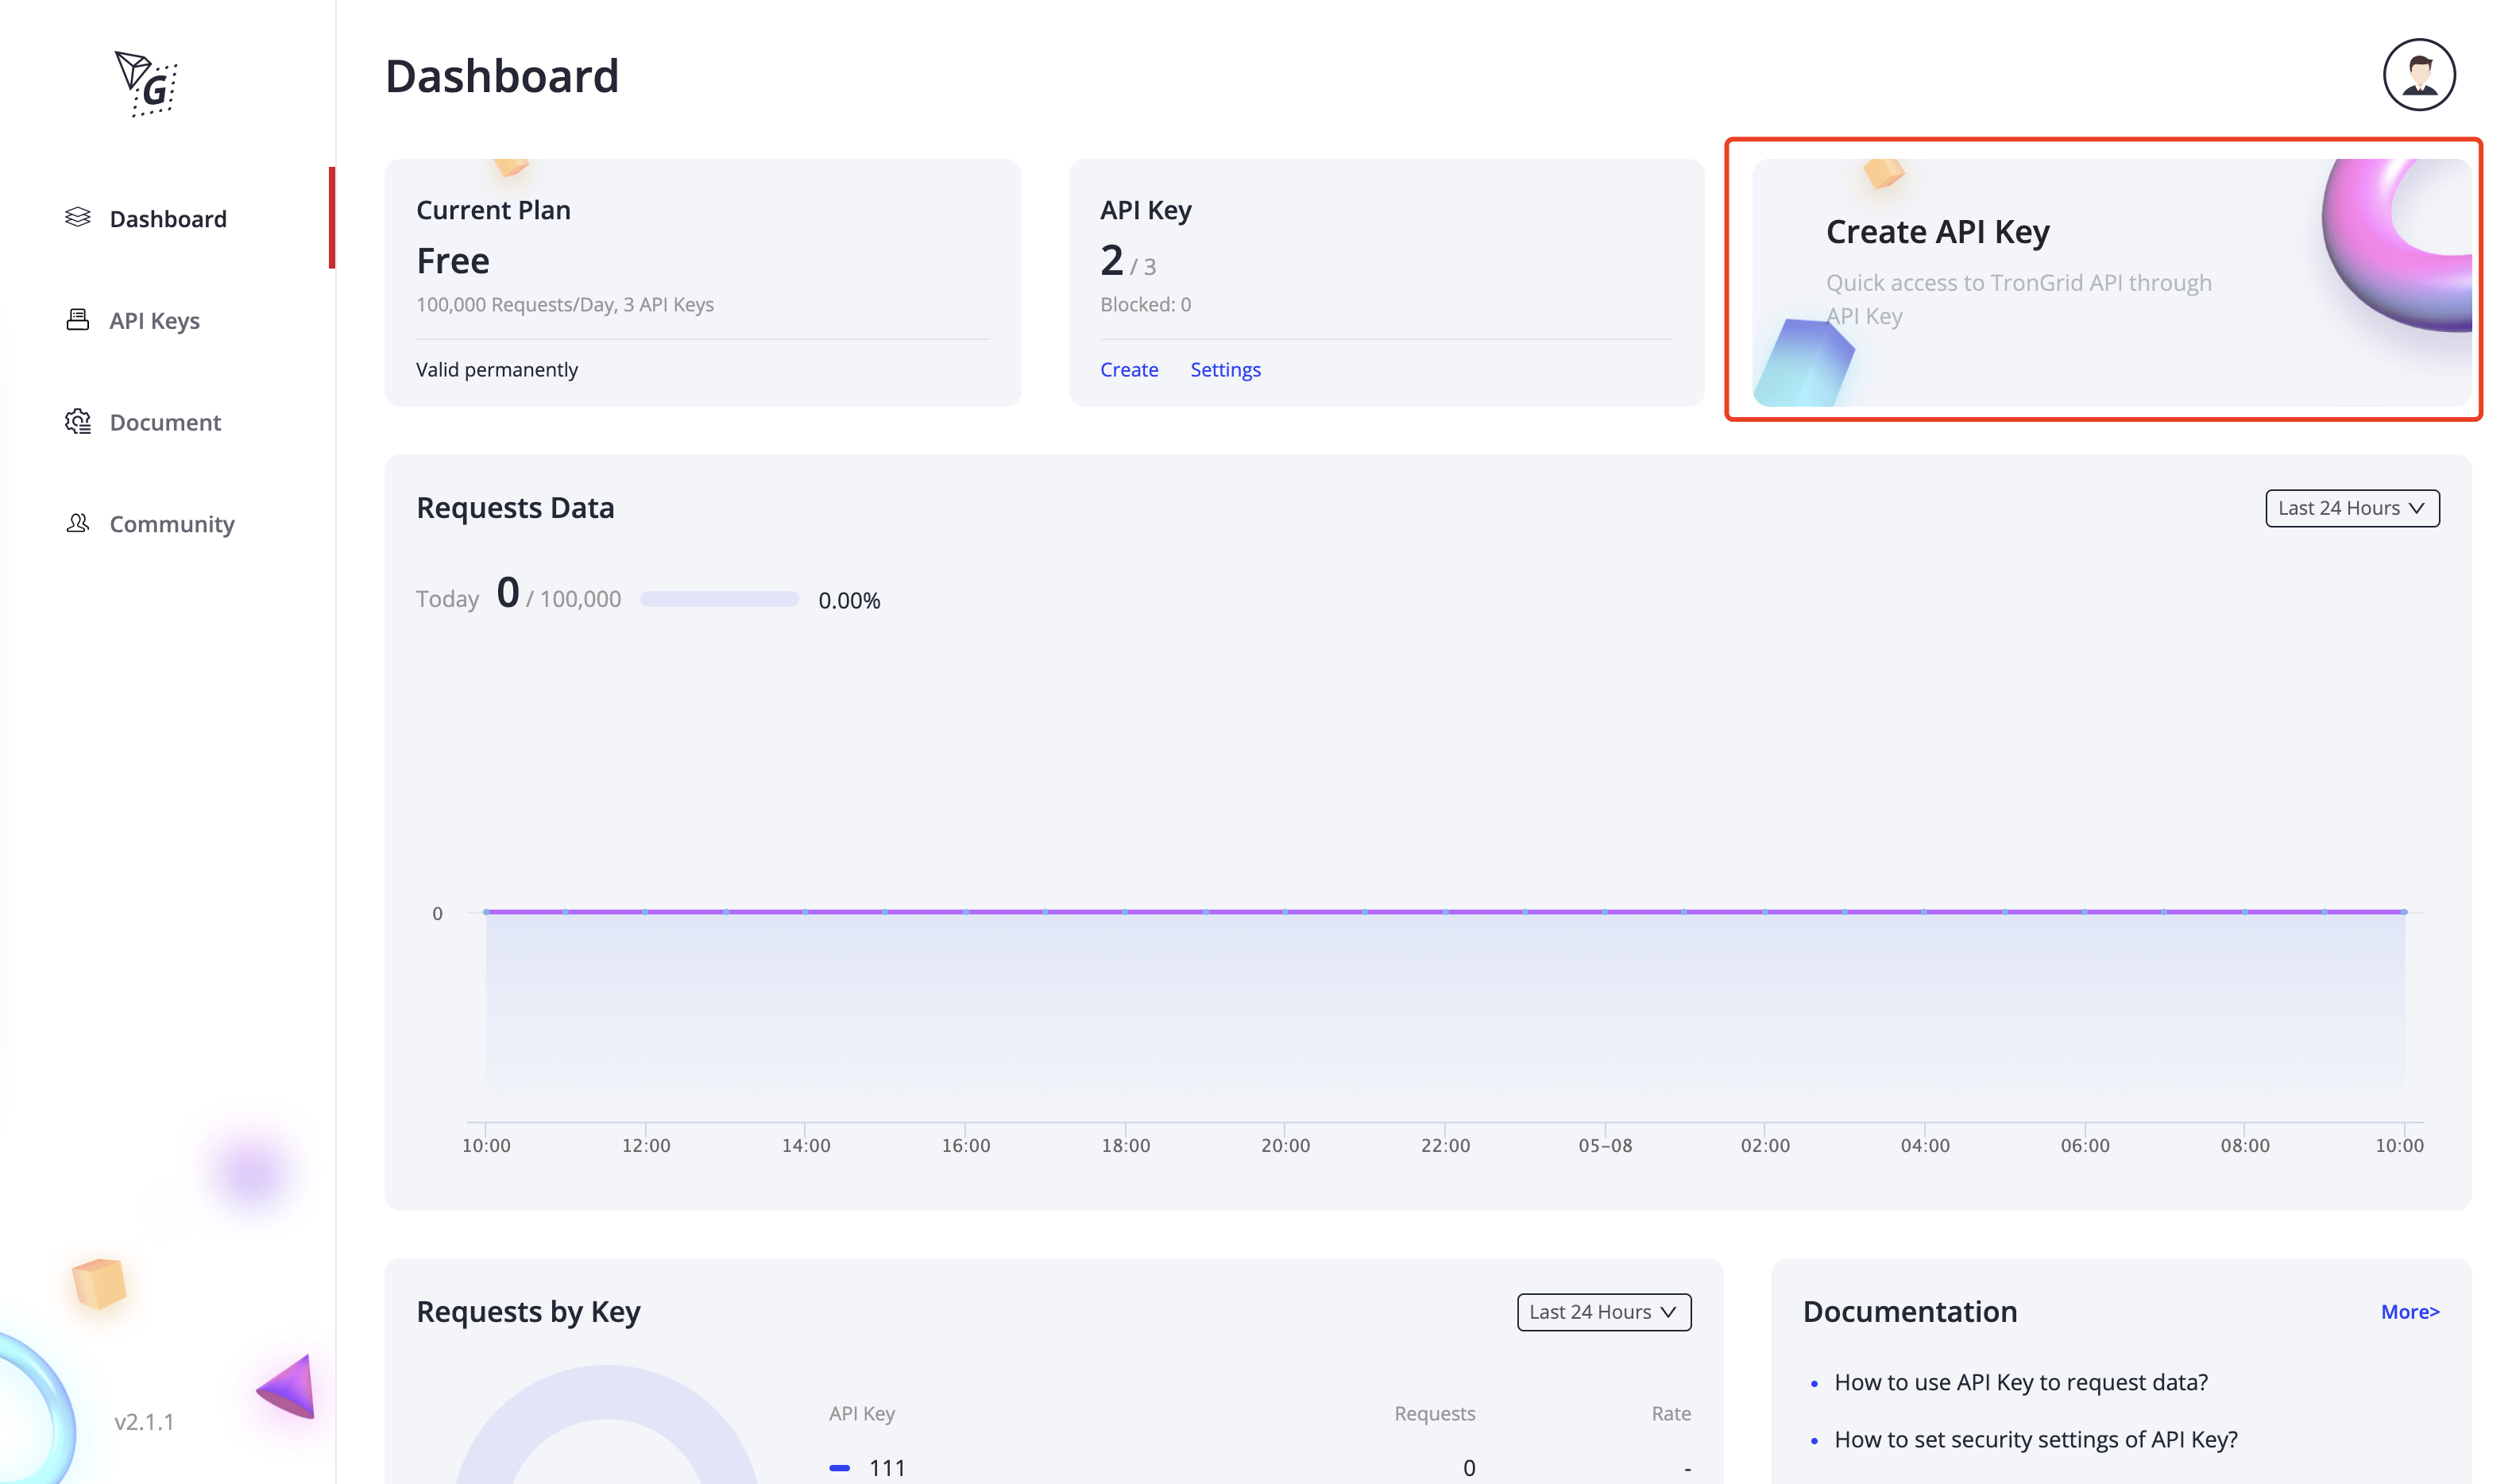
Once logged in , you will be directed to the Dashboard page. You can create an API Key and use it to query data , view analysis on data and easily access any documents :

On the page , click "Create API Key" to create a Key :
Click to learn how to use API Key to request data.
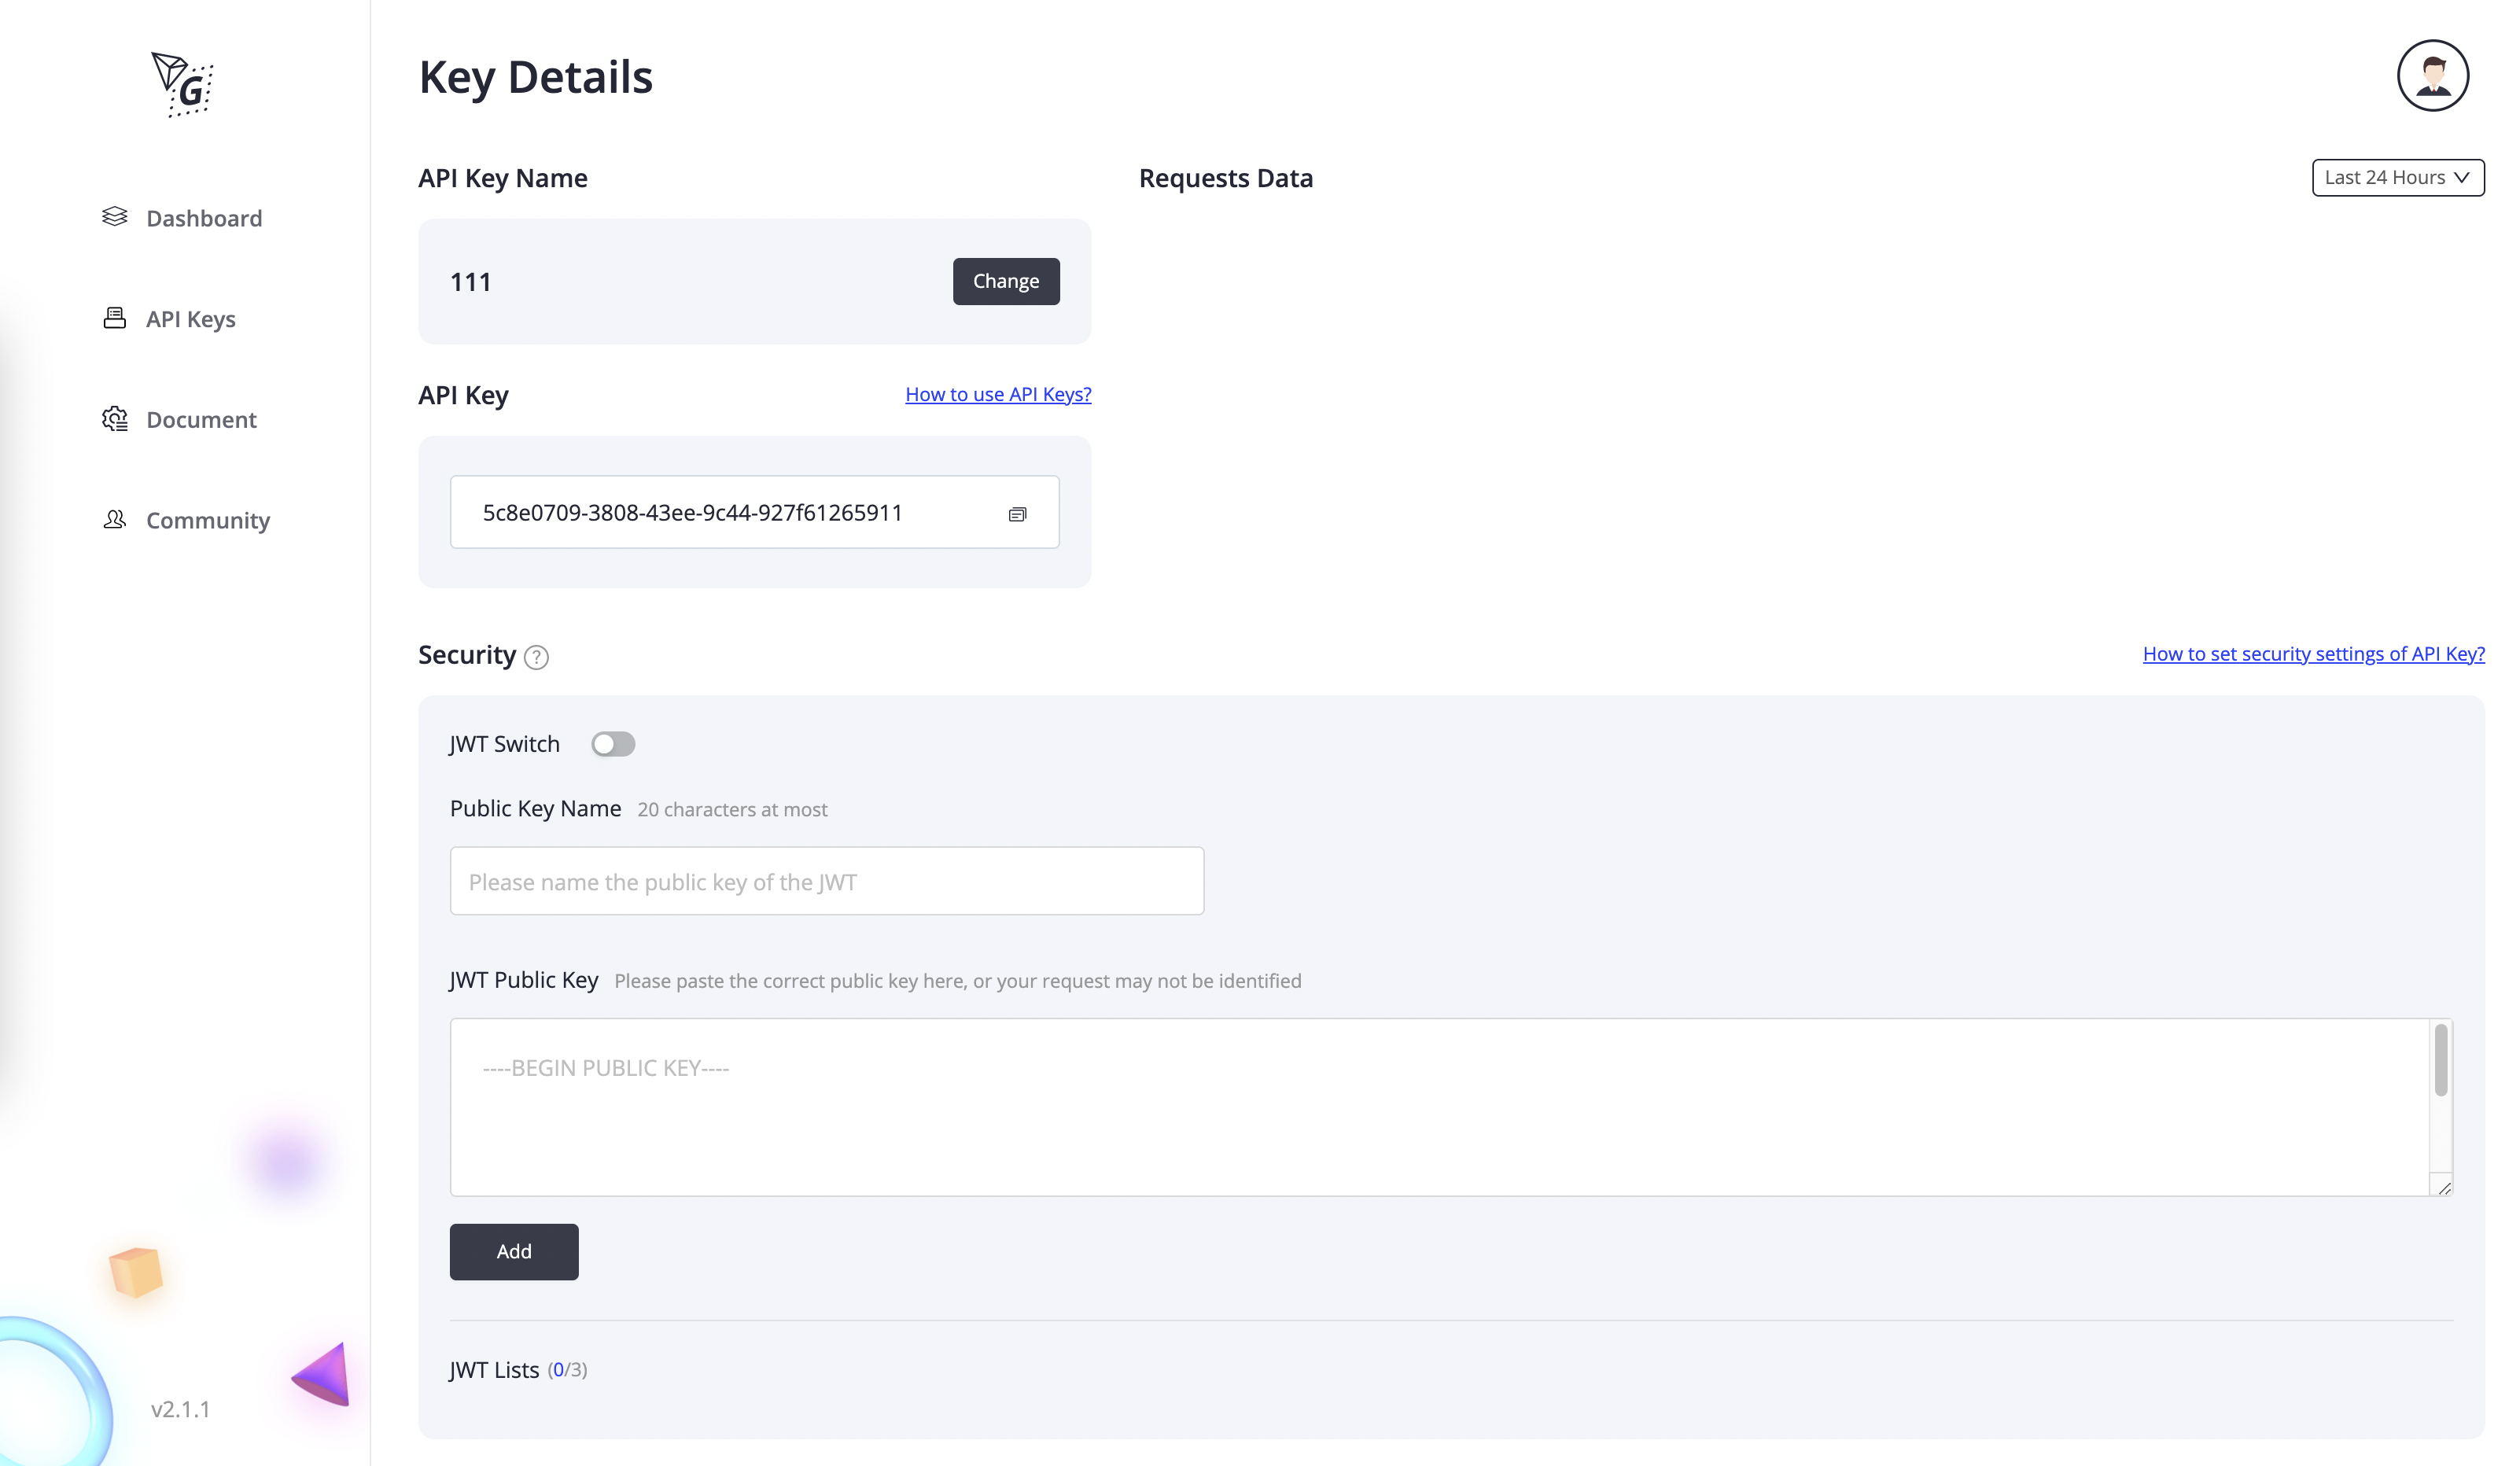
You can send curl requests or command prompts via the terminal to test your API Key. The URL for requests are as follow :
- Mainnet - https://api.trongrid.io
- Shasta Testnet - https://api.shasta.trongrid.io
API Key can be used by adding the parameter "TRON_PRO_API_KEY=your API Key" to the request header.
Tips: Requesting Shasta testnet using TronGrid does not require API Keys at the moment.
3. Link Your Wallet
You need to link your wallet to pay for higher-level plans.

Before linking , you need to have a TronLink Chrome wallet first , which can be downloaded via Chrome Web Store.

Click on "Link Your Wallet". This step requires your local signature (no miner fee is charged) to verify your permission to use the wallet.
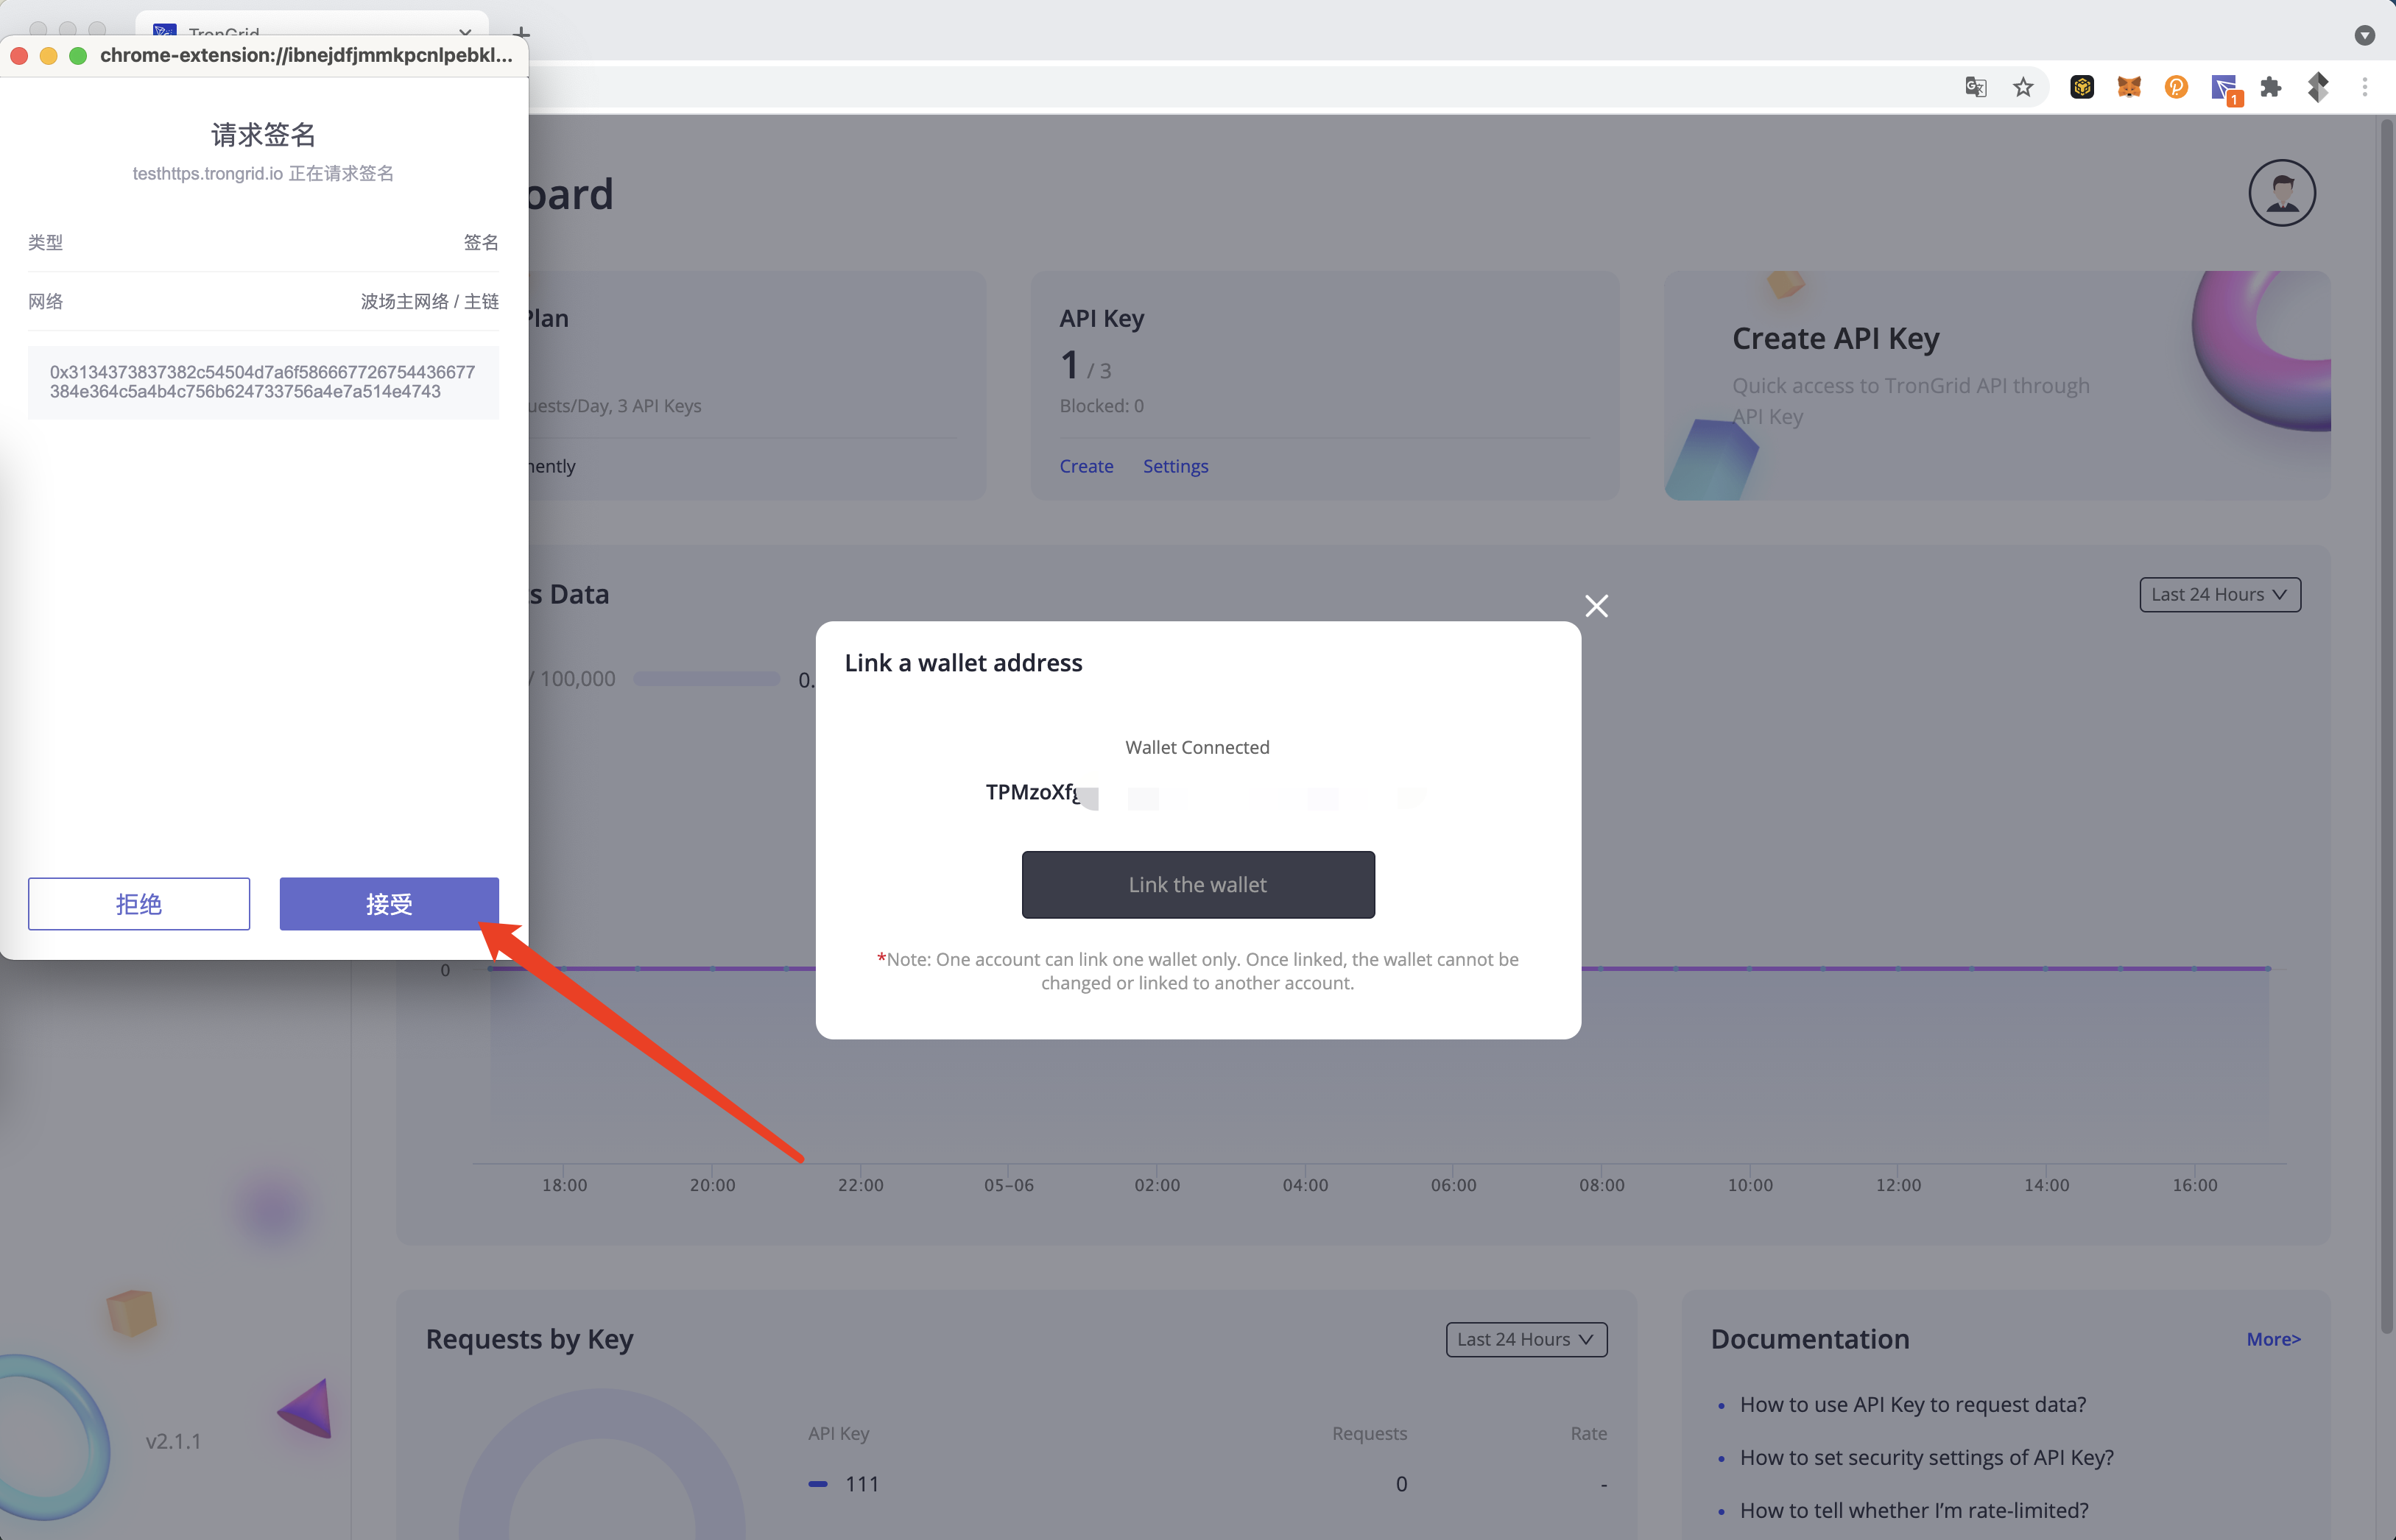
When this step is completed , your wallet will be linked successfully. Your current account balance is available at account details.

Your plan fees will be deducted from this wallet. (Note: Once a wallet is linked , you will not be able to link other wallets as one wallet can only be linked to one account.)
4. Enable Custom Security Settings
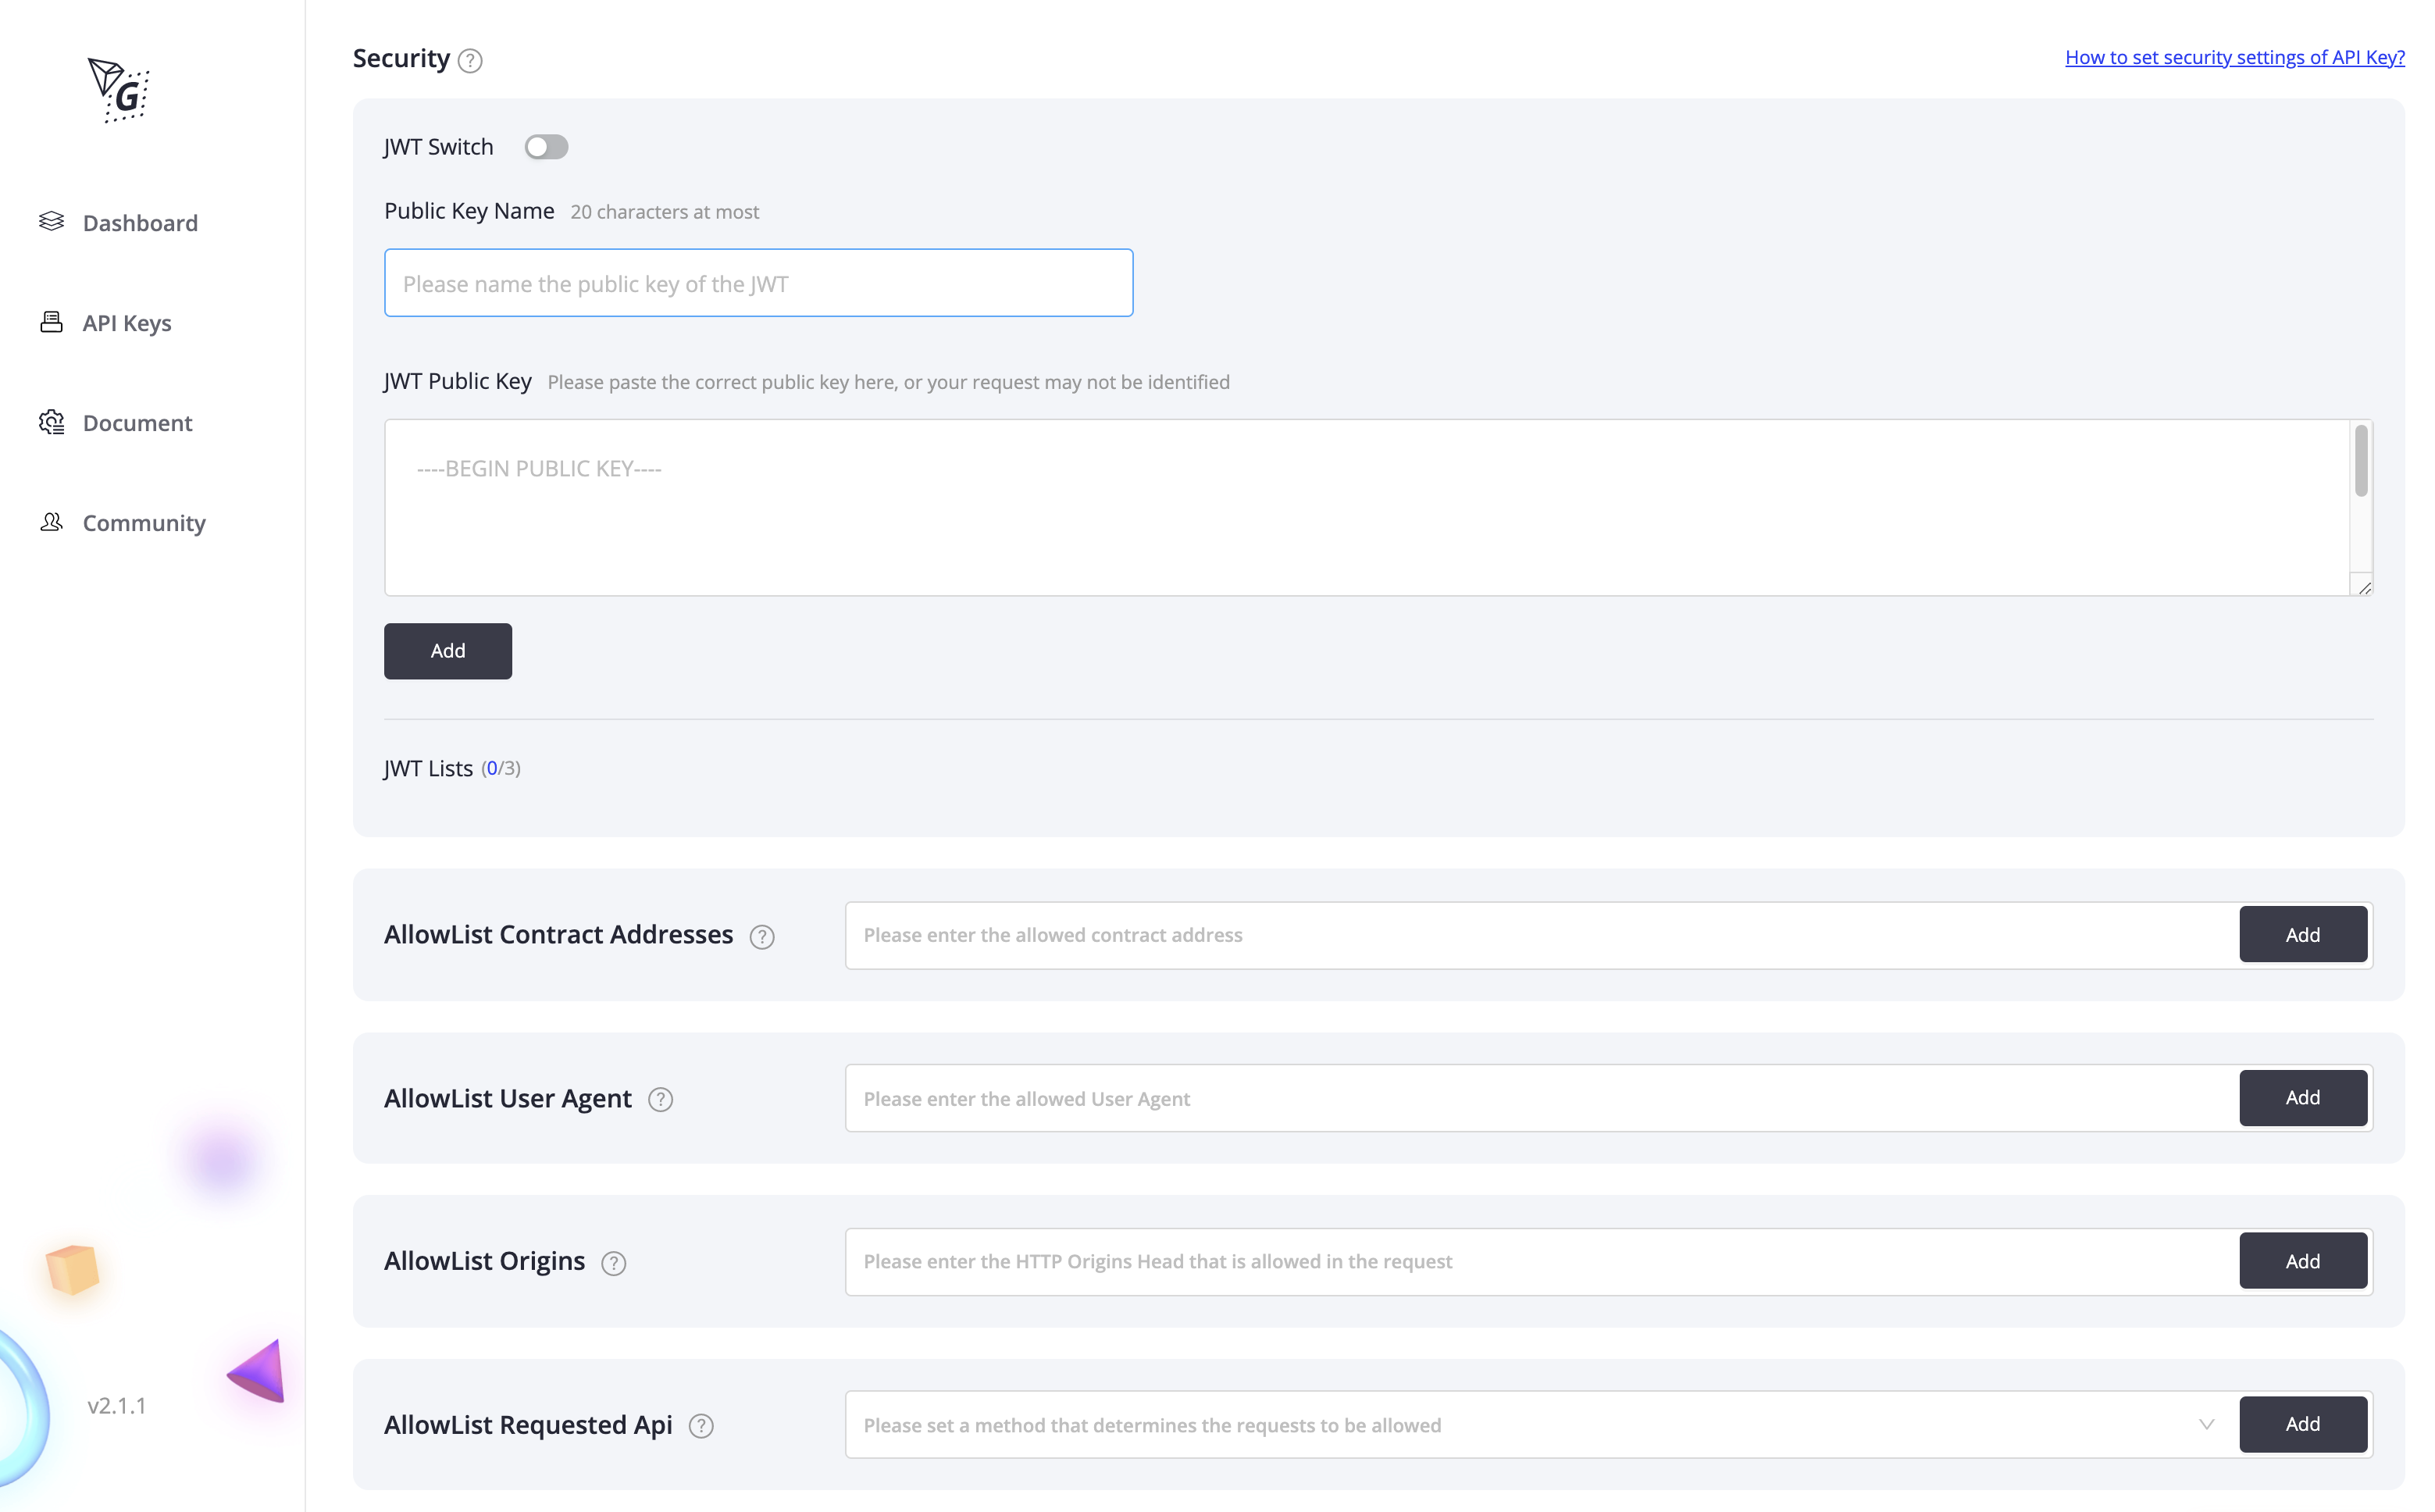
Click "Check" on the API Key list on the Dashboard to enter the API Key custom security settings page.

If you are sending API requests from a web browser or other client applications and not sure whether your project is fully secured , you can enable AllowLists function to block third parties from using your API Keys on other websites.
Tips
- If AllowList is not enabled for the project , all access requests will be accepted ;
- If one address is added to the AllowList , any API requests not from this address will be rejected.
View our documents to learn more examples in project security settings.
When all the steps are completed , you can send the request !
5. Send Requests
Send data requests through HTTP or Websockets to interact with TRON. More examples are provided in our documents. Please visit Developer Documentation for reference.
6. Learn More About Your Application Through Dashboard

Since you've now started sending requests , your Dashboard will record data of your requests and your usage of API Keys.
Visit your Dashboard regularly to check out more request methods , data that have been requested and the most active time period , and use the information to improve your application and the profile of your users.
Let's get started !
Comments
0 comments
Article is closed for comments.